
What is Moltbot?
Recently this big lobster fire out of the circle, Tencent cloud, Ali cloud, AWS and other 9 cloud vendors on January 28 synchronized on-line after the one-key deployment service, the operation threshold down to 3 minutes. Within 12 hours of going online, Tencent Cloud mirror downloads reached 42,000 times, and Ali Cloud instance usage exceeded 36,000, triggering a boom in the industry.
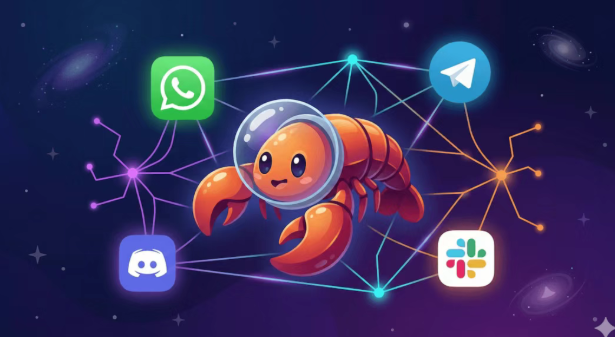
Moltbot (formerly known as Clawdbot, renamed due to copyright infringement) is a personal AI assistant that can run locally or on a VPS. Its core capability is to connect to browsers and multiple messaging platforms such as WhatsApp / TG / Discord / Flybook through the WebSocket Gateway architecture.
Simply put, it allows you to use Claude / GPT AI models in any of the above chat programs. It's like a very simple and easy to use Claude Code, but much more powerful. Moltbot is like a very powerful AI assistant, you just need to tell him what to do in the chat software, and he will work directly on the computer. As long as the computer is constantly powered, it can be online 24 hours a day, all year round, really - cow horse.
Note: Moltbot is very powerful, but it has just been launched and is not yet a full month old, so there are still a lot of problems and it is not recommended to deploy it on your main computer.
Deployment Options: Mac mini VS VPS
§Mac mini
Mac mini is all hyped up lately, and you have to configure a keyboard, mouse, and monitor, so that does add up to a lot of money. For those who want to use it for a long time, you need to have a fixed IP at home or be willing to toss in an intranet penetration, otherwise you won't even be able to connect to a Mac mini on the outside.
§VPS cloud servers
The advantage of VPS is that it can be opened and closed at the same time, online for a long time, randomly tossed, the cost of trial and error is low, and it can be destroyed and rebuilt at any time. The disadvantage is that there is no graphical interface, some things are very troublesome to debug. In order to quickly get started, here we take VPS as an example.
Step 1: Purchase a VPS
Based on official Moltbot advice:
- CPU: 2 vCPU
- Memory: 2 GB
- Storage: 20 GB SSD (enough)
- System: Ubuntu 22.04 LTS / Debian 12
Things to do after purchase
- Write down the server IP
- Connect with SSH: ssh root@your IP
- Update system: apt update && apt upgrade -y
Step 2: Install Moltbot
It is highly recommended to read the entire article before installing, at least the security piece, as the security policy will affect how you install.
One-click install (recommended, macOS and Linux supported) command:
curl -fsSL https://clawd.bot/install.sh | bash
This script does it automatically:
- Testing system environment
- Install the necessary dependencies
- Download Moltbot
- Starting the onboarding process
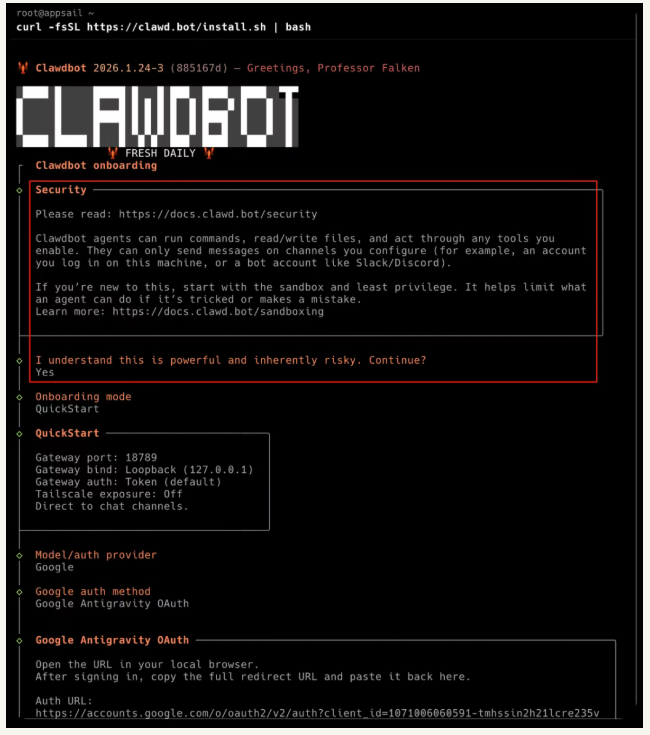
Key configurations during installation
onboarding will ask you a few questions:
- Gateway Port: Default 18789, generally do not need to change it.
- Model/Auth Provider: Select AI Provider
- Anthropic - directly using the Claude API
- OpenAI - using the GPT family
- Google - with Gemini
Step 3: Configure the messaging platform
After the installation is complete, configure the chat platform you want to access, just choose the one you are familiar with or want to access, here is Discord as an example.
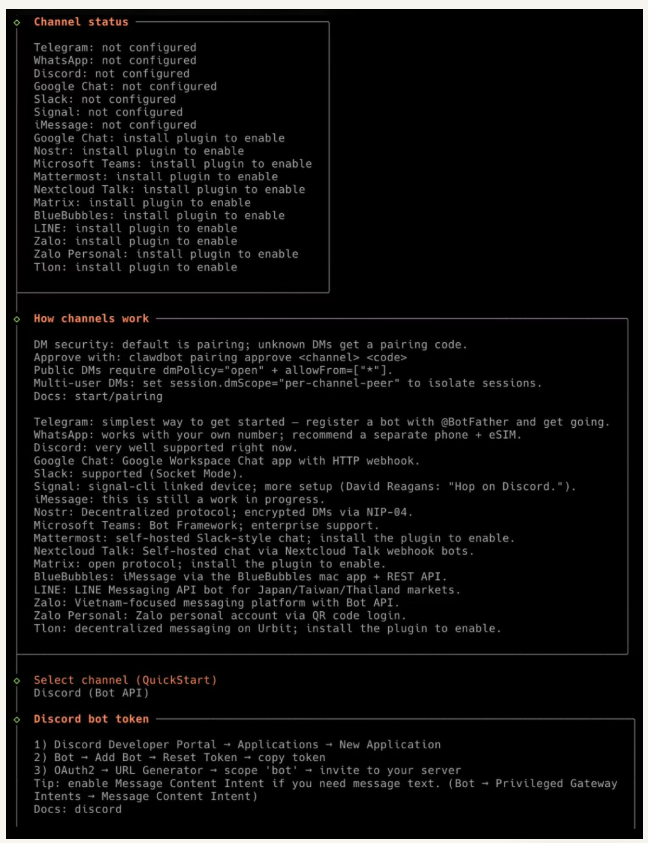
1. Creation Discord Bot
- Open Discord Developer Portal
- Click New Application → Enter name → Create
- Left menu tap Bot → Add Bot → Yes, do it!
- Click Reset Token to copy the Bot Token (it will only be displayed once, remember to save it)
2. Open the necessary Intents (important!)
Under Bot → Privileged Gateway Intents, turn it on:
- Message Content Intent - must be on, otherwise bot can't read message content
- Server Members Intent - recommended for username lookup and whitelist matching
- If you don't open the Message Content Intent, the bot will connect successfully but won't respond to any message, which is the most common pitfall for newbies.
3. Generating invitation links
OAuth2 → URL Generator: Scopes Check this box:
- bot
- applications.commands (supports slash commands)
- Bot Permissions check box (principle of least privilege)
Do not check Administrator unless you fully trust the bot. Copy the generated URL and open it in your browser → Select the server you want to install to → Authorize.
4. Configuring Moltbot
- Running the Configuration Wizard
- clawdbot channels add discord
- Paste Bot Token
5. Paired use (DM mode)
- DM mode requires pairwise authentication by default:
- Private message your bot in Discord with any message
- bot will respond with a pairing code.
- Approve on server: clawdbot pairing approve discord
- If you see Approved discord sender, the pairing is successful.
From a security point of view, it is recommended that you do not configure DM mode because you cannot see how people are requesting your server and it can be a security risk.
6. Server channel configuration
If you want to use bot in the server channel, you need to configure it additionally.
- Get ID (enable developer mode first):
- Discord Settings → Advanced → Enable Developer Mode
- Right-click the server name → Copy Server ID
- Right click on the channel → Copy Channel ID
Step 4: Security Configuration (emphasis!)
Moltbot has a lot of power, which means that security configuration is very important. By default, Moltbot runs directly on the host and can modify system files, and at this point, basically anything you can do in IM, on the command line, and in the browser, Moltbot can do as well, entering passwords and CAPTCHAs. In a few simple words, auto-upgrade, auto-install, auto reboot, Moltbot will do it all. All I can say is that it's really powerful. After the front-end and back-end were killed, now the operation and maintenance are also killed.
So for security reasons, when sandboxing is enabled, all Agent operations are executed inside the Docker container and cannot affect the host system. However, inside the sandbox is basically useless, the shell can't be executed, the networking function also can't be done for a long time, and the skills can't be executed, so it's basically useless.
So then you create a separate clawd user, use him to reinstall, and then at root constrain what permissions the clawd user has and what he can do. Here's a good place to ask ChatGPT He gives a lot of substantial advice on how to secure your hosting root.
Step 5: Hands-on experience
Setting the Personality
You can set up many different personalities for the Bot, and once the conversation is configured in Telegram/Discord/WhatsApp, just talk to the bot directly in the chat software. It will then:
- Understanding your needs
- Calling tools to perform tasks
- Return results
Summary
The whole process:
- Buy VPS or Mac mini
- One-click installation → curl -fsSL
https://clawd.bot/install.sh | bash - Configuration platform → Telegram/Discord/WhatsApp/Flybook
- Security Policy → Choose different security policies according to your usage scenario
- Getting Started → Direct Conversation in Chat Apps
